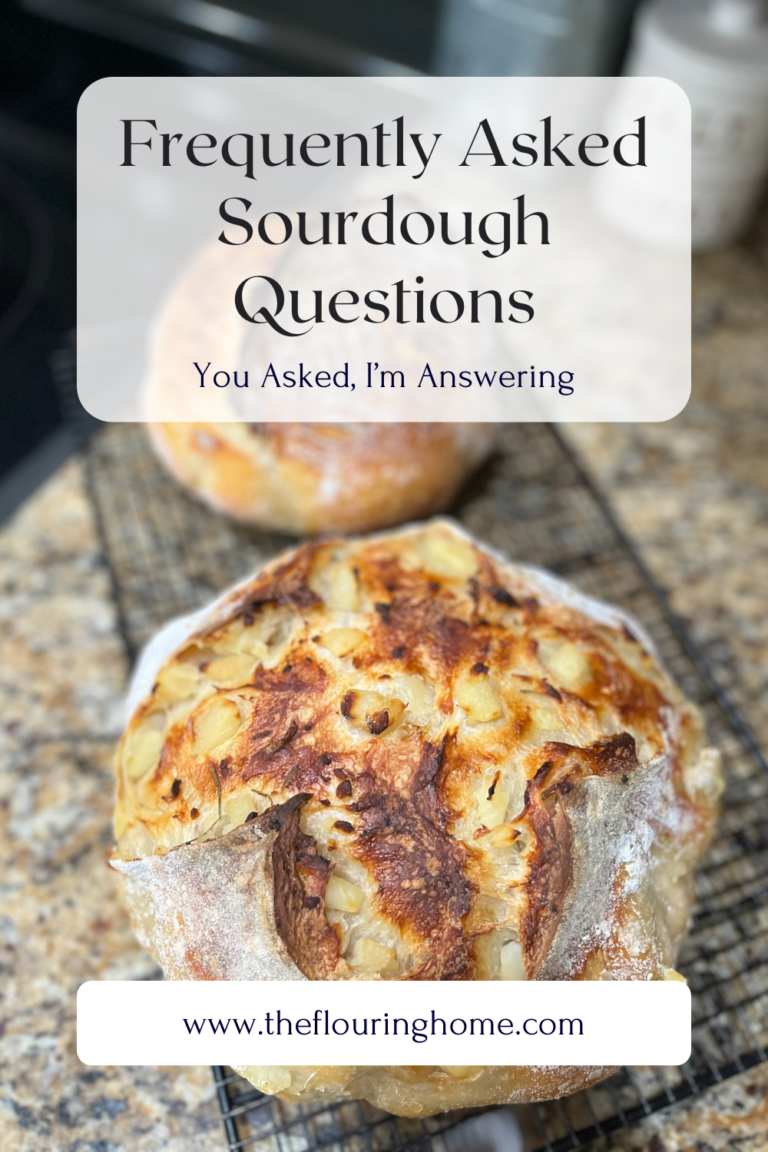
and I’m answering your FAQ’S regarding fresh milled flour, sourcing and sharing two new recipes
Disclosure: Some of the links below are affiliate links. This means that, at zero cost to you, I will earn an affiliate commission if you click through the link and finalize a purchase. This post is sponsored by Palouse Brand but all thoughts are my own.
First and foremost this is an evolving blog post. All content will be shared on this page by 11/21/25. Just tap the table of contents link to jump to the subject you want to read about.
fresh milled flour is it all the rage?
I truly dont think it is all the rage. I think we are in a food revolution where we care more about our ingredients and cooking from scratch. I think food allergies, the powerful benefits of fermentation and how food is produced and manufactured has really brought an awakening.
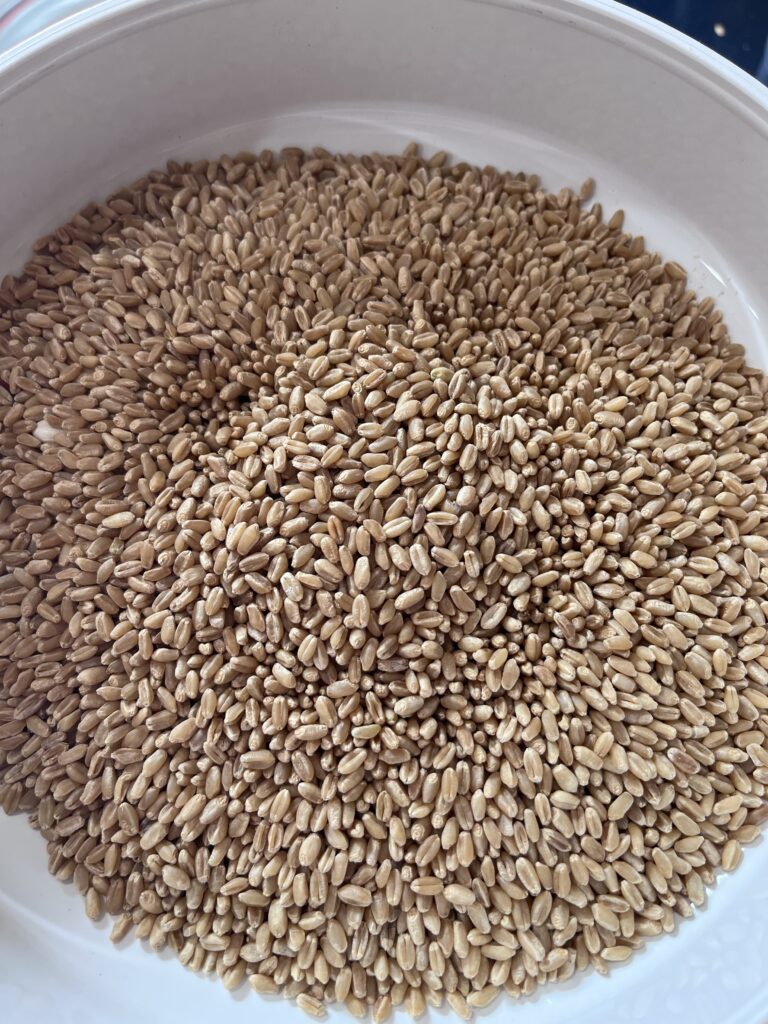
where to source my grain.
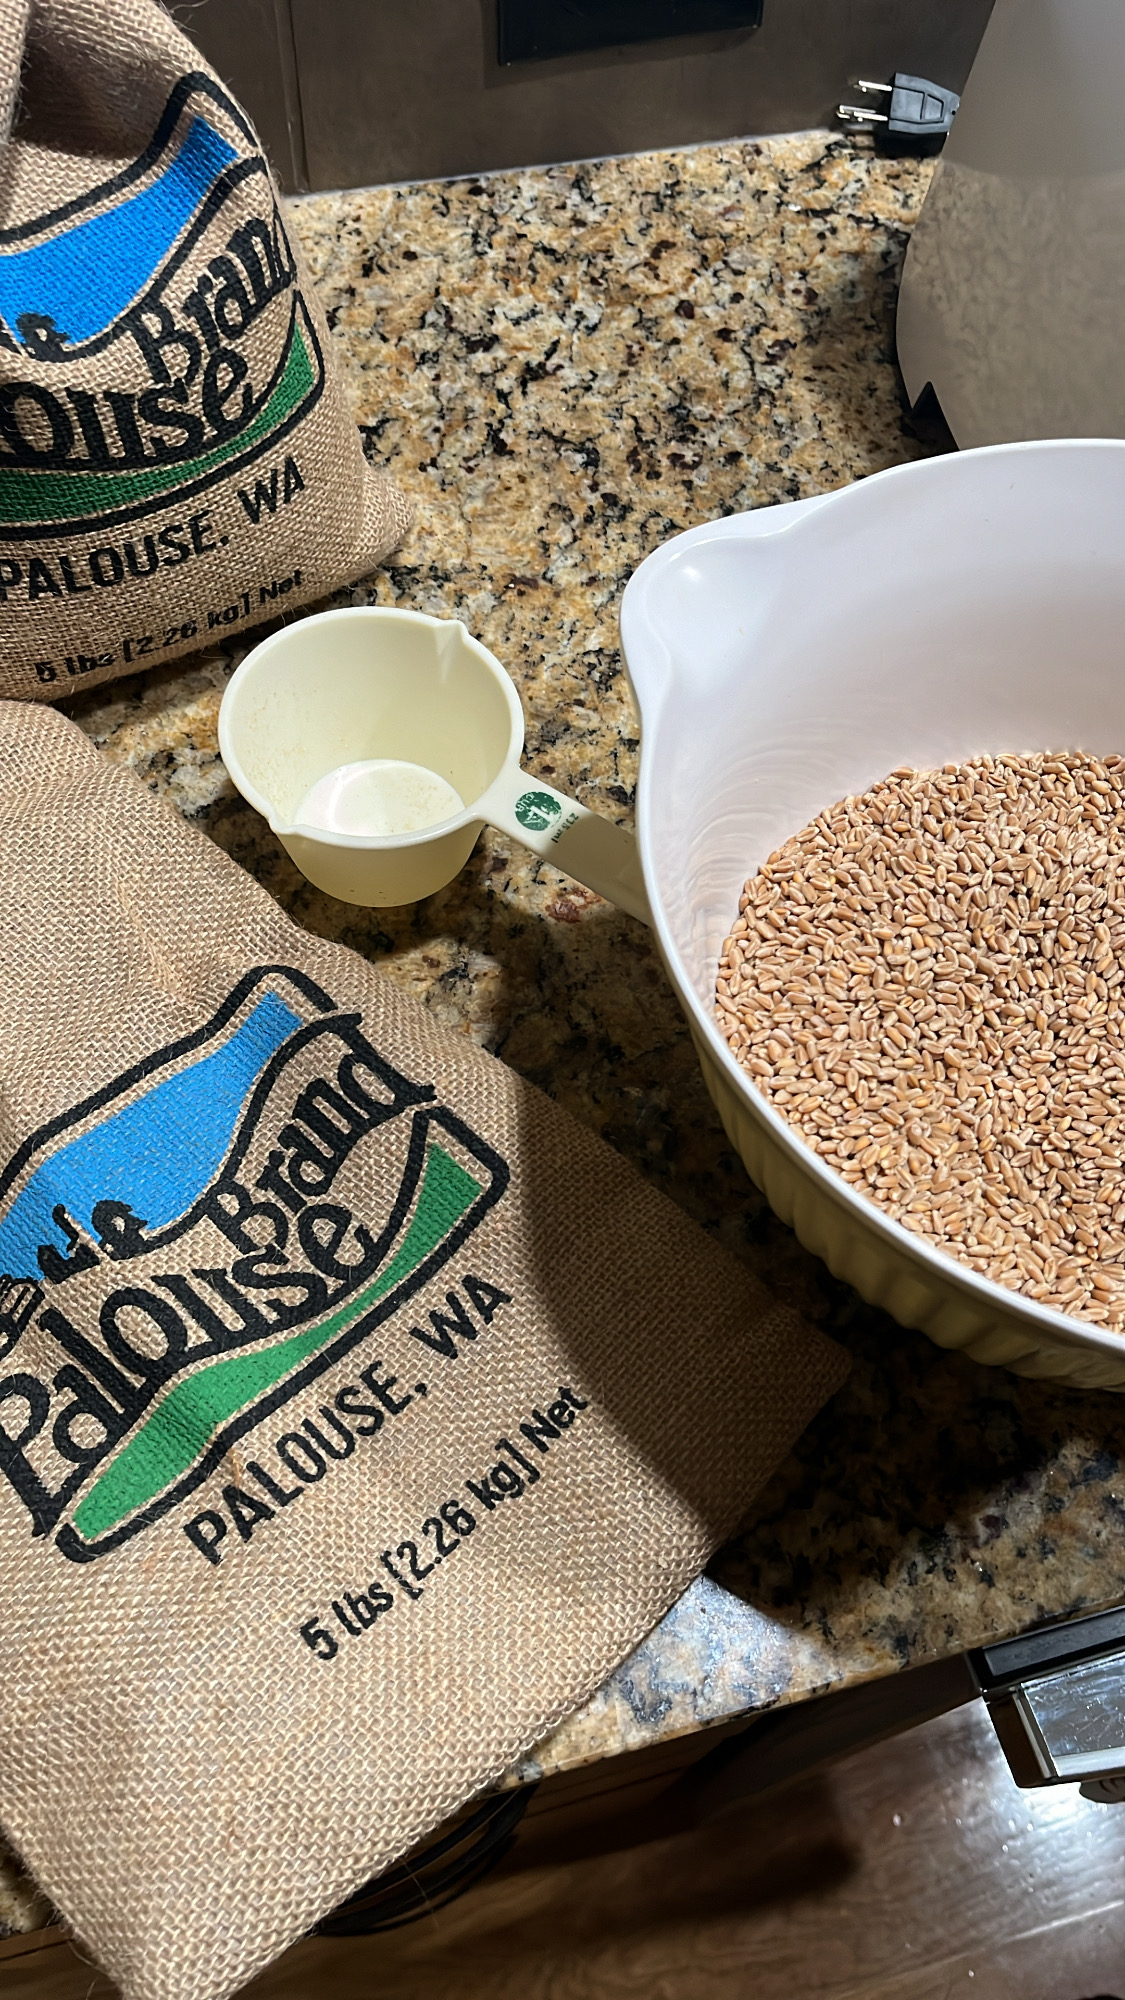
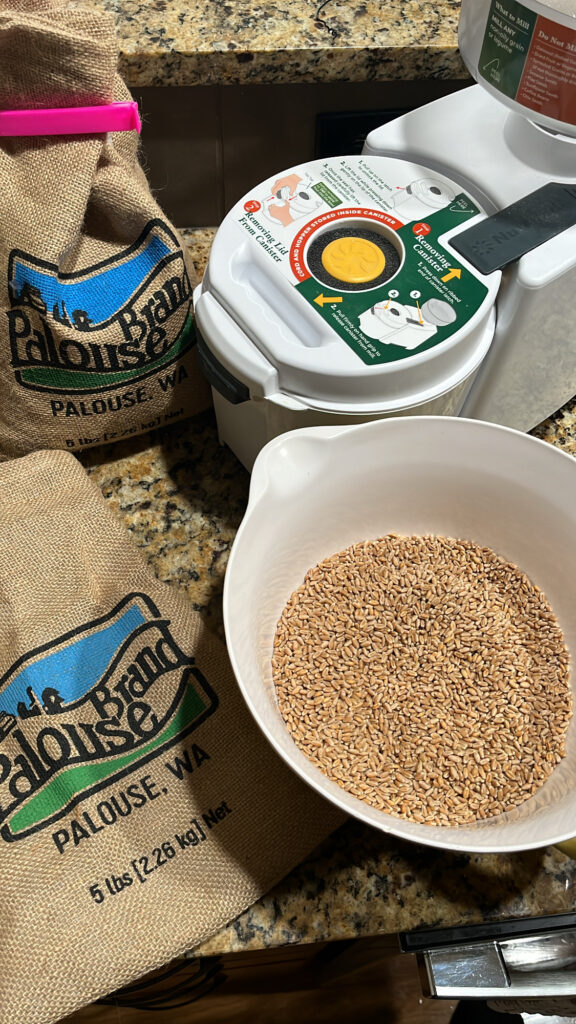
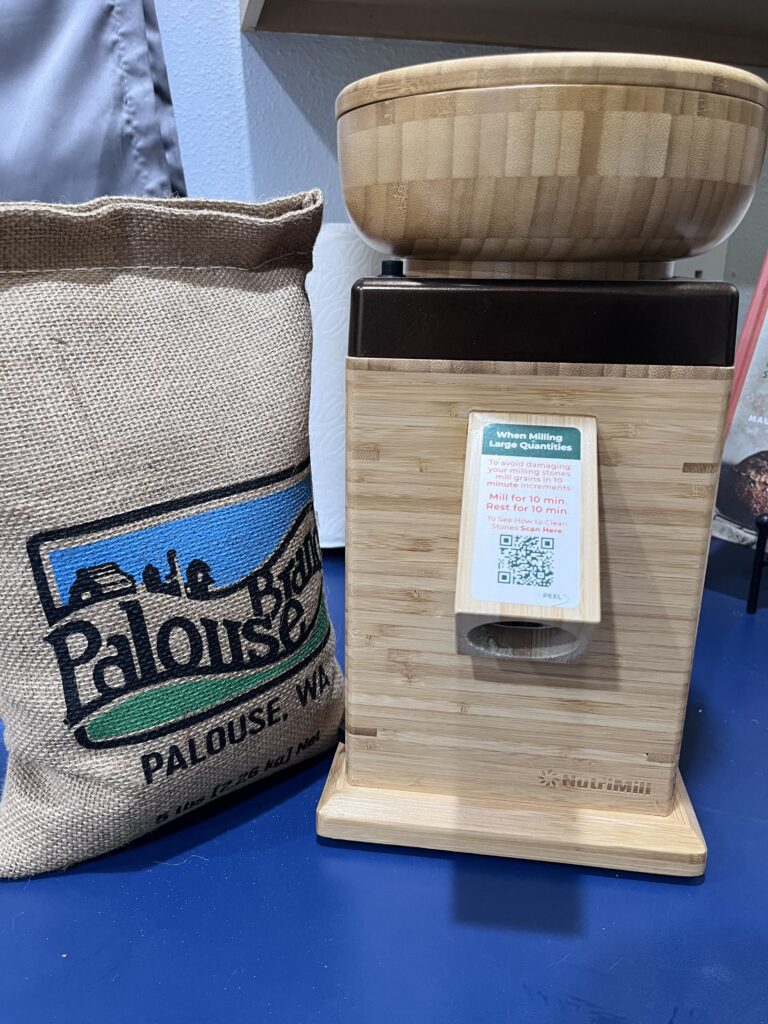
Why Palouse of course! I absolutely adore working with Palouse, their grains and the company is amazing. From their farm to our kitchens, palouse grows glyphosate residue free grain and it is nongmo. Palouse is located in the Pacific Northwest and just a days drive from where I live.
Palouse offers wheat: red spring and winter wheat, hard white and soft wheat too. They even just added DURUM and RYE Wheat. AND Palouse has beans and legumes and lentils. Some, but not all varieties are: lentils, chickpeas, black beans, split peas and pinto beans.
Where to shop, PALOUSE?! HERE is where you need to shop and palouse has graciously offered you 5% off of your order. Be sure to use code THEFLOURINGHOME to save.
types of wheat and how to pick the right grain for your recipes
The easiest way for me to remember which grain to use for which recipe. My soft baked and delicate items like to be made with soft wheat. Think recipes like cookies, cakes, pastries, etc.
My robust and sturdy recipes, like bread, would like to be made with hard wheat.
Have I ever made cookies with hard red? I sure have. They’re delicious in fact. But hard wheats will yield a gluten structure which is what you want for bread baking. Soft wheat will have a more difficult time trying to make bread out of, so just go make some biscuits instead.

how do i store my grain
Depending upon the volume you’re purchasing, I really like 1/2 gallon Mason Jars for small quantities to 5 gallon buckets and gamma lids (links below). Whole berries do not need to be treated as anything special. You can pour your whole grain into your container and that’s it! It’s only when freshly milled that you need to do something specific.
Here are my suggestions on storage containers:
- half gallon jars
- Canning lids & Vacuum Sealer (use code FLOURING10 at forjars.com)
- 5 gallon buckets (take a moment to create an azure account to order your buckets and grains)
- gamma lids
If you would like to store your berries and grain for longer term storage, you’ll want to use the pack fresh mylar and use my code FLOURING to save. More to come on theflouringhome.com on how to package food for long term storage.


Can I mill other items?
Yes! You can mill, beans and legumes, corn, gluten free grains and so much more. BUT you should not mill wet items: nuts, peanuts, coffee, already milled/flaked, flax, etc.
Do I need specialty equipment?
yes and no. To get started, if you do not have a grain mill, you can purchase preground flour. Palouse offers this ability.
Well, if you want to start milling youre going to need a grain mill. I have a full blog post on how to choose the right grain mill for your household. You can find that blog post here. for this particular project, I used the NutriMill Impact Grain Mill. It is a great beginner mill and comes in at just under $240. Want to save a little bit on your grain mill? Use code FLOURING to save you $20
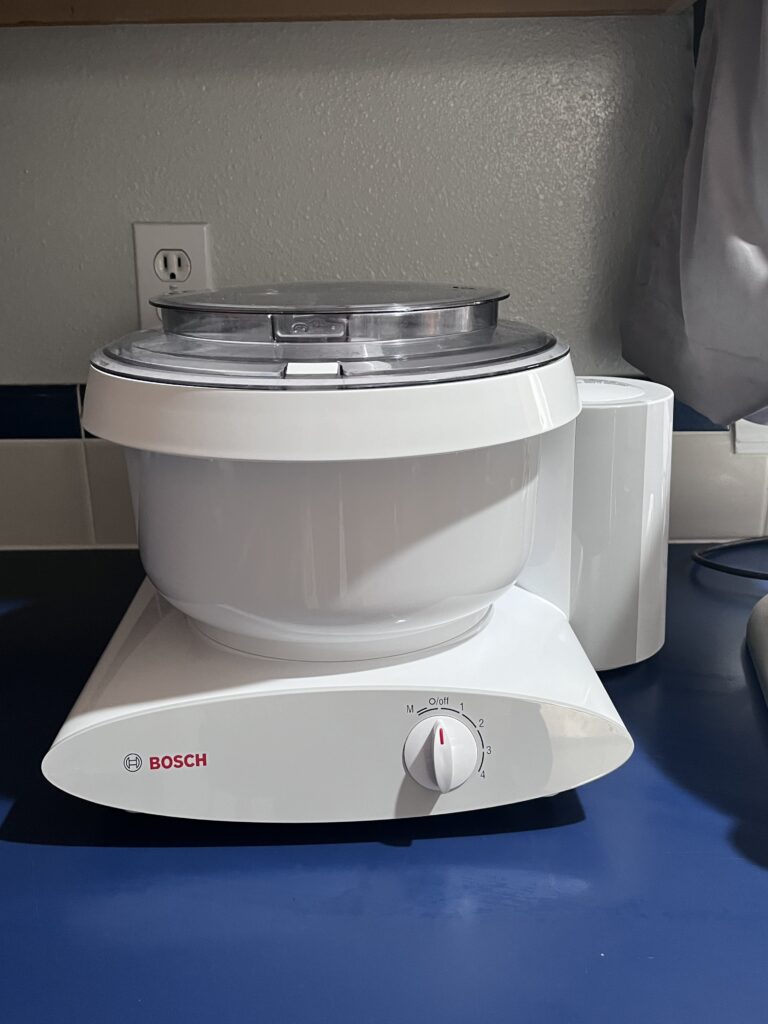
Having a mixer will be a huge benefit to help you in kneading your dough. I have the Bosch Mixer. It is also available at the nutrimill site and my discount code works site wide so be sure to use the code FLOURING at checkout. I also have the bottom drive stainless steel bowl SPECIFICALLY for bread baking. This is the only use for this bowl. Its designed for bread and kneading bread. If you’re at all curious about the Bosch Mixer, you’ll want to read my comparison between the Bosch and Kitchen Aid.
answering your FAQ’S
- how to handle the difference between using fresh milled vs store bought: make a sponge or autolyse. Whole wheat behaves differently. You’ll want to mix your liquids and flour and let it rest. It will take a moment for the whole wheat to soak up the moisture. If you don’t allow it to sit, you’ll want to keep mixing in flour and your product will be dry and not work.
- Do I mill my flour twice? No. You should never have to nor should you mill twice. If you are needing to do so, either your milling setting was wrong or (sorry) you have a terrible mill. It should also not take your 20-30 minutes to mill flour. I can mill everything I need for LARGE batches of flour in under 10 minutes.

make fresh milled bread with me
HERE IS THE VIDEO for how I make bread. It is a quick one. Let me know if I need to slow it down and create a bake along series for this. Also, let me know if a printable recipe would be helpful. Let me know in the blog comments
Here is your FRESH MILLED SOURDOUGH FRENCH BREAD recipe:
Ingredients:
370 g (approx 1.5 cups) active sourdough starter
700g (approx. 3cups) water (I use a water filter from Clearly Filtered, code BFCM20)
1200g (approx 6-7 cups) hard red wheat flour (this is the end result of having milled the berries into flour)
45g (3TBSP) coconut sugar
60g (1/4cup) olive or avocado oil
12g (1TBSP) redmond real salt, code FLOURING (i use the kosher salt, but its all amazing)
OPTIONAL: 3-4TBSP heavy cream (this isnt added to the dough but added right before baking)
To begin, make a sponge: a sponge is made with all of your water, starter, sugar and part of your flour. These four ingredients are added to your mixing bowl and gently combined. Allow to rest 20-30 minutes
Next add oil, half of your remaining flour and salt. Turn your mixer onto medium (if youre using the bosch mixer no. 2) and allow to combine. Slowly add flour 1/4 cup at a time until your dough is starting to ball up in the center and has pulled away from the sides. THIS is when you know you have enough flour.
Knead for 8-10 minutes until dough is smooth and elastic and you can get a window pane in your dough.
Remove the dough hook and allow to bulk ferment on the counter for a few hours or until doubled (this can take 4-6 hours, remember cold temperatures slow fermentation but it doesnt stop it! it just needs more time).
Once doubled, place your dough, covered, into the fridge for 24 hours.
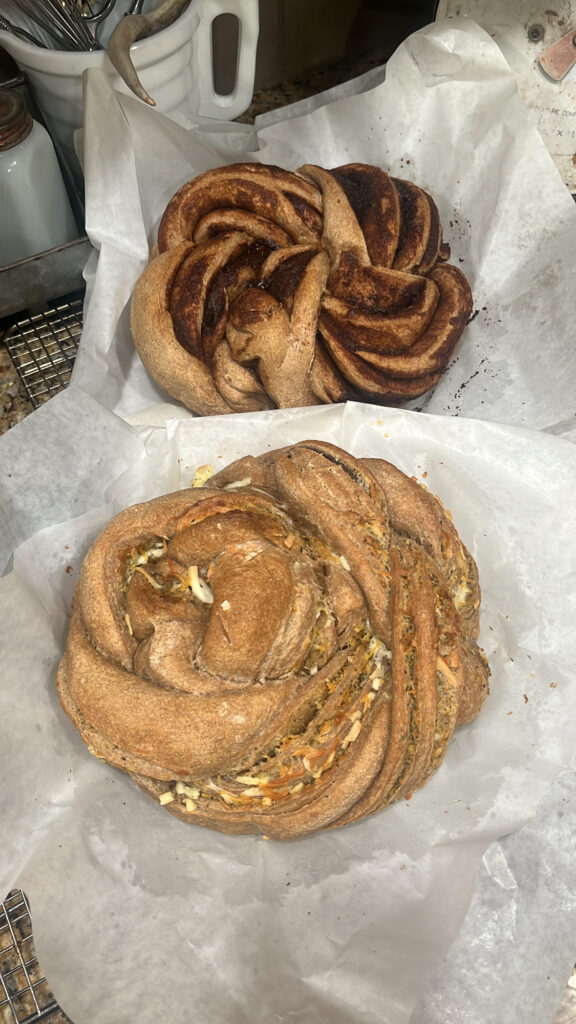
Now is the fun part! You can choose to fill or not fill your dough. I have two variations for you:
CINNAMON SWIRL FILLING
for two loaves: 1/2 cup melted butter, 1/2 cup brown sugar, 1/4 cup cinnamon, 2 tsp vanilla, sprinkle salt. Mix all ingredients together and split between two loaves. SHAPE according to your preference. IF you want this sweeter, double brown sugar. AS IS, its cinnamon forward and more savory. Serve with a whipped honey cinnamon butter.
GARLIC HERB AND CHEESE
for two loaves: 1/2 cup melted butter, 1 TBSP garlic and italian seasoning, sprinkle salt and 4 cups of cheese. Combine butter, garlic, italian seasoning and salt, spread over dough. spread half of the cheese and shape
Remember this makes two loaves. So you will need to split the dough in half. Spread your filling to the edges, roll up like a cinnamon roll, crimp and shape. Read below for shaping tips.
Allow to rise for another 45 minutes before baking. IF you want, pour 3-4TBSP heavy cream over your braided, filled loaves. This is not needed if you are just making the french bread version, without a filling.
Baking:
pre heat your oven to 375. Place your shaped dough onto parchment and transfer into a dutch oven. DO NOT USE THE LID! and bake 45-50 minutes.
If baking just french bread, shape into long loaves, this would be the cinnamon roll shape and pinching the edges like in the linked video below. Score the top and bake 375 for 40-45 minutes. These are baked on a baking sheet, not in a dutch oven
how to shape my loaves for the WOW factor
CHECK OUT THE SHAPING VIDEO HERE
I like to shape mine into wreaths, twists, and rounds. This video has a great demonstration.
If you are utilizing a filling, a key tip is when you are twisting or braiding, keep the filling pointed UP, if possible. In a three strand braid, its more difficult to do since one strand will have an open bottom. The purpose for this is to try to contain the filling and not have it leak/spread out in baking. To help mitigate burns and clean up, I would definitely be using parchment. I do love my bread slings (I get them from mod kitchn, code THEFLOURINGHOME), but in this case, if any sugar is involved, just save yourself and use parchment.

make peanut butter chocolate chip cookies with me
HERE IS THE VIDEO FOR COOKIES
Ingredients:
1/2 cup butter
HEAPING 1/2 cup peanut butter
1/2 cup brown sugar
1/2 cup white sugar
2 tsp vanilla
1 egg OR 1/4 cup sourdough starter
1 1/2 cups milled soft white wheat
1 tsp baking soda
1/2 tsp salt
3/4-1 cup chocolate chips
Begin by preheating your oven to 350 degrees.
Cream together your butter, peanut butter, and sugars. I used the cookie paddle attachment for my Bosch Mixer. Cream in egg and vanilla.
Add your dry ingredients: flour, soda and salt. Gently combine.
**you might need more flour depending up the runny-ness of your peanut butter. I honestly just used the generic cheap peanut butter. I know. I know, but it makes the best cookies.
Gently stir in your chocolate chips.
Remove the paddle and place your bowl into the fridge to chill 20-30 minutes. using a cookie scoop, scoop your cookie dough onto prepared baking trays. (silpat mats). I fit 9 cookies per tray.
Bake 350 for approximately 10 minutes. allow to cool on baking sheet for 5 minutes before transferring to a cooling rack. Enjoy warm, but the peanut butter flavor really comes out when cooled.
Pro tip: scoop one cookie and bake it! This is my test cookie to be sure I have adequate flour in the dough. I dont want the cookie to spread but maintain shape.
Recipe makes about 2.5 dozen depending upon your scoop.
My favorite fresh milling accounts:
The accounts I turn to for inspiration are:
- Kristin: Generation Acres Farm, you’re in for a real treat! Kristin is my GO TO for milling! She is a PRO. Everything you want to know about milling flour and baking, you’ll want to learn from Kristin. She has so graciously offered a discount for you. With the exception of grain mills (see above NutriMill links & discounts), you can get 10% off with code FLOURINGHOME10 at generationacresfarm.com
- Kate: Venison For Dinner
- Michal Grappe
- Milli: My Whole Homestead
I would say Kate and Better Basics Milling and myself are really the only accounts that use fresh milled AND sourdough. I really dont see a lot of individuals sharing about the two. Fresh Milled is usually always with yeast.
additional resources
- how to choose the right grain mill for your household
- Milling Grains: Frequently Asked Questions
- The Beginners Guide to Home Milling
- Kitchen Aid or Bosch Mixer: which one is the king of the kitchen
- How to Make the Viral Sourdough Croissant Bread (Fresh Milled)
- NO DISCARD Sourdough Method
- The Cowboy Way Sourdough CookBook (digital copy)
- 4 Bake Along Tutorials to Help You Bake Sourdough Better
Did I miss anything?? Leave a comment and let me know.
Happy Baking!
~Boots