

So you want to bake bread but you dont know where to start?
No worries, friend! I am going to show you how to do it.
Each day this week, I will be breaking down the steps to how I make bread.
Disclosure: Some of the links below are affiliate links. This means that, at zero cost to you, I will earn an affiliate commission if you click through the link and finalize a purchase.
Before we get started
I need you to know a few things. I am not a professional baker. I am self taught and learned from those who passed their skills on to me. I would rather have a technically imperfect loaf that tastes amazing rather than a perfect loaf and it is bland and tasteless. I am a homebaker. I bake for my family and how my family likes bread.
I believe sourdough should be fermented and that we harness its true power. You will not find “quick” recipes here. Rather I will teach you how to plan and make bread so that you can enjoy sourdough, so that sourdough can fit into your life, but that sourdough doesn’t make your life revolve around it.
Supplies needed
- Established sourdough starter
- All Purpose Flour, I use Central Milling from costco (its the green and white bag)
- water
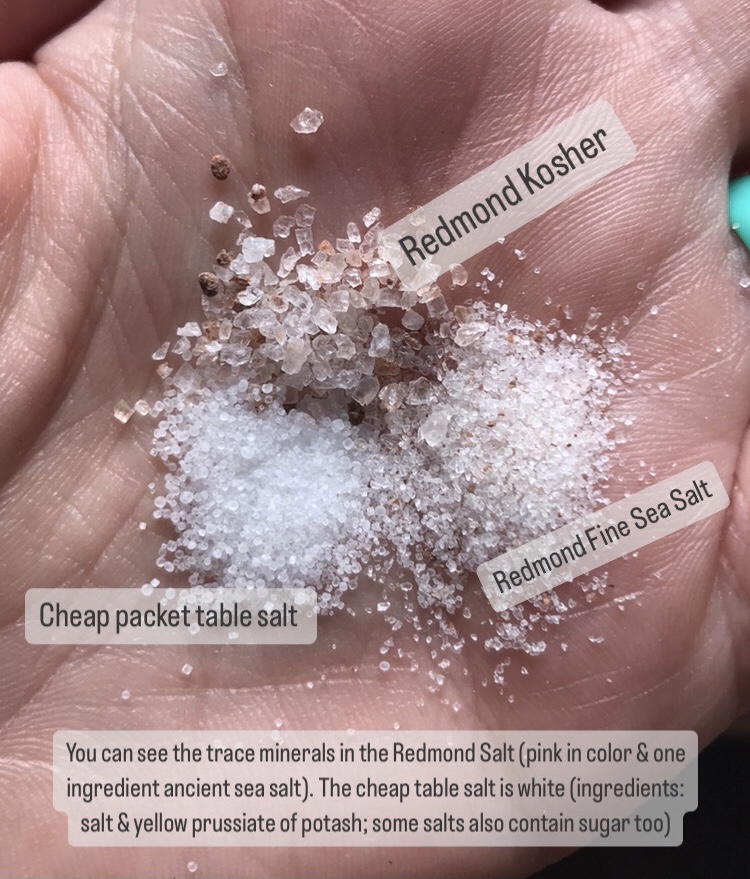
- salt (taste the difference with REDMOND REAL SALT, discount code FLOURING)
If you need a starter, you will need to make a starter or buy a starter.
For a step by step guide to create a starter, check out this post HERE
You see my starter has been passed down from my great grandfather to my dad and now to me. I do offer the ability to purchase my starter if that’s something you are interested in. If so, you can PURCHASE A STARTER in my shop or bundle it with my cookbook here.
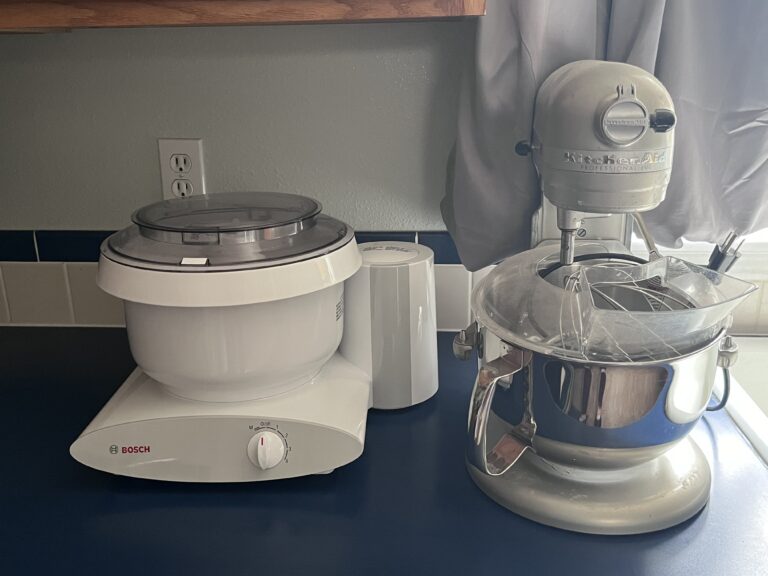
Additionally, you may choose to invest in some other useful sourdough tools and equipment. Read my blog post pertaining to these essential items.
Daily Breakdown and Examples
The corresponding step and video is on the list below and is clickable.
- How to feed your starter in preparation for bread making
- replacing your starter and reserving it
- Mixing the dough
- Stretch & Folds
- Bulk Fermentation on the counter
- Shaping and Cold Fermenting
- Baking Tips and Tricks
- Packaging up your loaves
- Crust Control
- But What if I don’t Have XXX Sourdough Tools
bonus videos:
- reading your dough
- why doesn’t my dough look like yours
- bulk fermentation
- what happens if you don’t do anything aside from mixing your dough
Remember, I do the Cowboy Way Method of maintaining my sourdough starter, which means I do not feed & discard daily. This is how my great grandfather taught us to make and maintain our sourdough starter. READ MORE HERE
I will also share these videos to youtube and create a playlist too.

the recipe
MAKES 2 LOAVES
1000g all purpose flour
25 g salt
750g water
250 g ACTIVE starter
To make an active starter, the night before you mix your dough, feed your quarter cup of starter that has been in the fridge, 125g each water and flour. Lid and let rest over night. I practice the CowboyWay method for sourdough, which means I do not discard and my starter lives in the fridge unless I am actively baking. READ MORE HERE
This dough is a bit messy but beautiful at the same time. Also a quick note…why grams versus cups. Grams is more accurate. When I weigh I try to be within 5-10grams. Cups is a bit subjective and wont always yield the same results time after time.
- Before you begin, remove a quarter cup of starter from your active mixture and place into a clean jar. Lid and place into the fridge. Now, mix your water and starter until it looks milky. Add your flour and start to mix, then add Redmond salt.
I always add salt last as it can inhibit growth.
2. Let rest at least 15 minutes
3. Perform a series of stretches and folds every 15-30 minutes 3-4 times.
4. Then allow to bulk ferment for 4-6 hours on the counter, covered.
5. you can either shape loaves and place into bannetons OR place the whole bowl (covered) into the fridge overnight. You can cold proof this for 12-48 hours depending upon your schedule. If you chose to place the whole bowl into the fridge, at least 6 hours before baking you will need to shape your loaves and place them into bannetons.
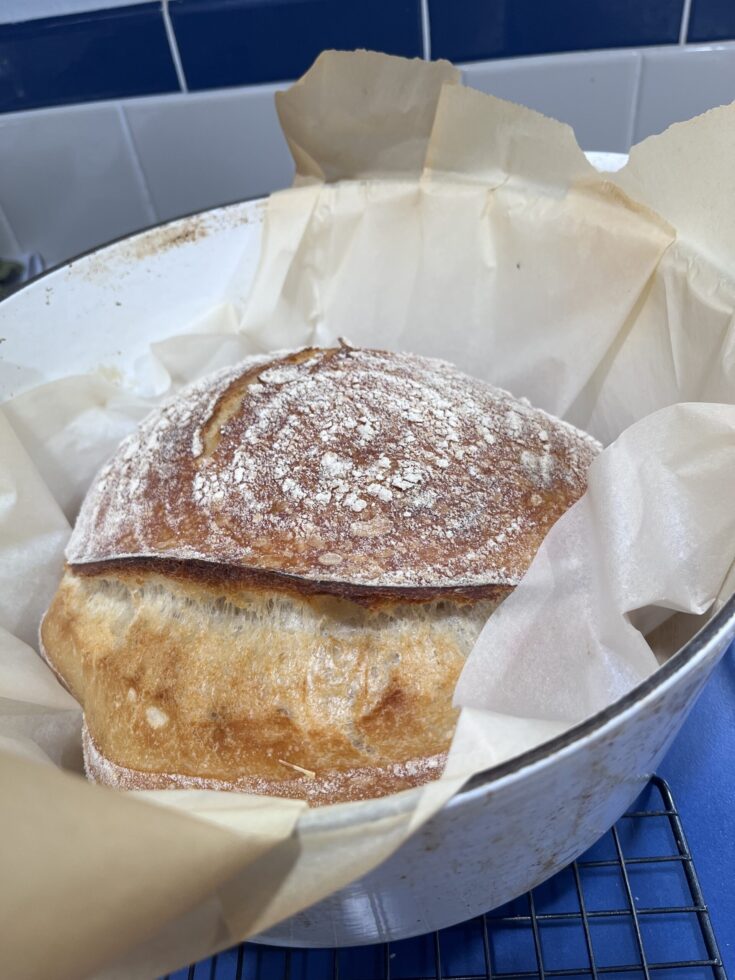
6. About an hour before baking, place your dutch oven(s) in the oven in the center of your oven and preheat to 450. When your oven is done preheating, remove your dough from the fridge, gently flip onto parchment or silicone slings. SCORE your loaves and place into your HOT dutch ovens. Bake your loaves at 450 for 30 minutes with lid ON, then 25 minutes with lid OFF.
PROTIP: if the bottom of your loaf is getting TOO thick, while baking add a cookie sheet halfway through. This will act as a buffer still allowing heat to bake but not give direct heat to give you a thick bottom crust.
Jump to printable recipe
High Hydration Sourdough Loaves
Ingredients
- 1000g all purpose flour
- 25 g salt
- 750g water
- 250 g ACTIVE starter
Instructions
1. Before you begin, remove a quarter cup of starter from your active mixture and place into a clean jar. Lid and place into the fridge. Now, mix your water and starter until it looks milky. Add your flour and start to mix, then add Redmond salt.
I always add salt last as it can inhibit growth.
2. Let rest at least 15 minutes
3. Perform a series of stretches and folds every 15-30 minutes 3-4 times. (this is flexible! if its once every hour thats ok!
4. Then allow to bulk ferment for 4-6 hours on the counter, covered. You're looking for your dough to just about double in size and show some bubbles on top;
5. you can either shape loaves and place into bannetons OR place the whole bowl (covered) into the fridge overnight. You can cold proof this for 12-48 hours depending upon your schedule. If you chose to place the whole bowl into the fridge, at least 6 hours before baking you will need to shape your loaves and place them into bannetons.
6. About an hour before baking, place your dutch oven(s) in the oven in the center of your oven and preheat to 450. When your oven is done preheating, remove your dough from the fridge, gently flip onto parchment or silicone slings. SCORE your loaves and place into your HOT dutch ovens. Bake your loaves at 450 for 30 minutes with lid ON, then 25 minutes with lid OFF.
Notes
PROTIP: if the bottom of your loaf is getting TOO thick, while baking add a cookie sheet halfway through. This will act as a buffer still allowing heat to bake but not give direct heat to give you a thick bottom crust.
Recommended Products
As an Amazon Associate and member of other affiliate programs, I earn from qualifying purchases.
Finishing up
If you want even more sourdough recipes, then you’ll love my Sourdough: The Cowboy Way cookbook
Thank you for being here and making bread with me.
Happy Baking! ~Boots
Other content you might like
- how to jumpstart your lagging sourdough starter
- Frequently Asked Sourdough Questions
- How to Calculate Macros for Sourdough Bread
- 7 Signs your Sourdough Starter is Happy
- Year Round Sourdough Baking Strategy
- Long Fermented Whole Wheat Sourdough Tortillas
- Sourdough Honey Oat Loaf Recipe Card
- The Beginners Guide to Home Milling
- Milling Grains: Frequently Asked Questions


Is it OK to have less starter in this recipe? I realized I only have 150g to use and I don’t want to wait to feed it again to double it.
I’ve not tested it with a lesser amount. It will take longer to ferment, so if you do decide to bake this recipe with less starter just know your timeline will be impacted.
If I understand correctly , when my Dutch oven and oven is preheated I’m taking shaped loafs from the fridge and putting them to the oven ( inside the Dutch oven of course ), straight from the fridge to the oven right ? No warming dough on the counter ? Please clarify this first me , thank you
That’s correct! With this style of loaf, the dough needs to be cold when baked.
Hi, so happy I found you. The amount of flour I’ve been wasting and it just seemed stressful. Excited to try cowboy method. My kitchen is cold. 60ish degrees. The 4-6 hours to double? Do I need to invest in proofing box? Or will it just take longer? Thanks!
My house is cold too so I would think you’re going to be more along the lines of 6 hours but don’t just go by time, go by what I share about what I’m looking for to know when I like to stop my bulk fermentation time. I don’t think you need a proofing box. I personally think it’s an unnecessary piece of equipment, but that’s my opinion.
I am an experienced baker….but with yeasted breads. This transition is proving to be difficult.
I tried a recipe yesterday with an established starter I purchased. I failed. So I got back on your page, read everything, and watched your tutorial videos. I prefer not feeding a starter daily, so I like your method.
I got better flour and tried again today following your exact recipe. The same thing happened! I did 4 sets of stretch-and-folds (though admittedly at the end I thought there should be more shape to the dough). The dough rose until a bit over doubled in a warm place. It looked good. Then I went to pour it out to shape it, and it just spread out everywhere like a giant blob. There was no way to shape it, build tension, nothing. It was a gloopy mess. I must be doing something wrong.
Any troubleshooting ideas that you have would be greatly appreciated before I quit and decide this just isn’t for me.
I stop my bulk fermentation time just before it’s doubled so more like 1.25-1.5 in size. But the texture change is one of the biggest factors I watch for. The other thing to note is that your house humidity and temperature will impact your dough. If when you mixed and your dough didn’t look shaggy like mine but rather more wet, that’s a key indicator that you’ll need more flour. I live in a dry and cold climate so this recipe is fried and true for the environment. More humidity means less water or more flour for the recipe.
If I’m halving the recipe, when should I halve mt starter? At feeding, or the next morning?
You would halve the amount you’re feeding your starter
Boots, I have two shaped loaves fermenting in my fridge and there has been very little action since I started them – I’m quite sure it’s my starter. Can I warm the two loaves to room temp, fold together with additional hoppin’ starter and go back to the bulk ferment stage? I’ve baked loaves that looked like these before and there was no rise and they became a lot of breadcrumbs.
Oh no! This makes me so sad to hear!! Unfortunately, it won’t work to add in more starter right now. Tell me more about your starter. Let’s try to get that starter fixed so you can make some great bread.
I was about to treat it with some potato water but I fed it and left it for two and a half days (!!!) in a different location and it bubbled up beautifully. Compared to what it was looking like before, this is a huge improvement. I made enough for two more loaves and a batch of cinnies – fingers crossed!
I don’t have a Dutch Oven can your recipes be made in a loaf pan as a Sandwich Loaf. I have been trying g different recipes and always end up with gummy loaves. Going to try your Cowboy Style starter
I don’t see how it wouldn’t work. However, I’ve never tested my recipe (such as this one) for a loaf pan.
I followed at the instructions and during stretching the dough looked great. Got nice and tightened and held shape. After the counter ferment of about 6 hours cause I ended up leaving the house for a bit. It had great bubble and a nice jiggle but when I poured it out to shape it was runny and wouldn’t hold shape or cut in half easily.
Did I leave it too long on the counter? I live in Denver so at high elevation and my AC was on pretty low. So maybe too cold inside the house?
Thanks for any tips and help. First time trying sourdough so no clue what I’m doing lol
I’m most definitely thinking it was too long at bulk fermentation (watch this video: https://www.instagram.com/reel/DHM2W4wyfZg/?igsh=Z3Blb3NtYzY5ejQ2) and I would watch this video (https://www.instagram.com/reel/DGWuQx3uT37/?igsh=ZzJqdXJ4Y2lqdG1s) to be sure your dough looked like mine right after mixing.
I’ve baked at Denver altitude and so t think this is the issue, nor do I think your house to cold. My house is 63 dg F in the peak of winter and my bread does just fine. Cold temperatures slow fermentation but it doesn’t stop it.
You say an hour before baking preheat oven and Dutch ovens to 450, does that mean leave oven on for an hour then put loaves in?
That’s correct! You want the Dutch oven to warm up and be hot before you put your cold loaves into the hot Dutch oven.
Hi there! (I’m totally new to sourdough) Sorry if you’ve stated this somewhere, but how often do you have to bake in order for your starter to not die in the fridge? Is there a minimum you have to bake? Once a week, etc? I don’t bake a lot but want to do the minimum to keep my starter! And if you don’t bake one week, do you have to feed/discard? Thank you!
There’s no minimum! And when we’re not baking, my great grandfather taught us to be hands off. So I could be baking once a week or it could be months before baking. The only time it will die in the fridge is if there is mold or a bacterial contamination.
Wow! That’s great! That’s my kind of technique! Blows my mind that anyone wouldn’t do it this way! How do more people not know about this? So, when I feel like baking, you say all I do is: the night before take it out, feed it, leave on counter over night, then the next day I can bake with it? I don’t have to do more than just that one initial feeding?
I created my starter about 3 weeks ago and I have been nervous about how to begin. Your post showed up on my Facebook feed, so I followed you to Instagram, and then to your blog. You gave me the confidence to mix up my first dough. It is currently sitting on my counter awaiting its first stretch and fold. Wish me luck!
How exciting!!! I’m cheering for you and thank you for sharing your story with me.
I was so optimistic that I’m finally doing sourdough right. Everything was looking good until the laminating/shaping. After 4 hrs on the counter at room temp, my dough looked like yours – big bubbles, doubled. I turned it out on the counter and it’s super sticky (sticks to my hands and my board). I can sort of stretch it out, but it’s super sticky and won’t hold together to form a nice ball of dough like yours looks. Mine stays shiny and sticky and doesn’t come together. Did I not let it proof long enough? I put it back into the bowl for a few more hrs to see if it’ll improve but I’m afraid I’ve overworked it when I tried stretching and laminating.
It’s definitely over proofed. Every house humidity and temperature is different so that will impact how quickly your dough ferments. Key steps will be mixing, making sure your dough looks like my video where it’s still shaggy. Don’t be afraid to build tension with stretch and folds. How warm is your house?
Thanks so much for the guidance. My house is usually 70-72°. Next time I’ll try 3 hours on the counter instead of 4. Maybe that’s where I’ve been failing all this time.
Here we go… I mixed my starter last night (I actually did it early eavening and thought maybe it sat to long), I came out this morning at it looked so ready. I’ve mixed in the flour water and salt. I am just waiting for my first stretch and fold. Very excited for this method. 😬
Yeah!!! I’m so excited for you! Let me know how it goes?
Quick question…if I put the whole batch in the fridge for the cold proof and do the forming 6 hours before baking, do I place the bannetons in the fridge after I’ve placed the dough in them?
I don’t know if this is a duplicate but here goes….if I pu the whole bowl in the fridge and take it out 6 hours before I want to bake it for shaping, what is the process there?
Help!! I’m 2 hours away from 6 hours for baking my bread….what do I do? I put the whole batch in the fridge last night. I will be shaping and stretching this morning and I’m unsure if I put it back in the fridge or leave it out. Thanks!!
Josie, I’m so sorry! I’m just seeing this. If I ever don’t reply or reply right away, Instagram or my email [email protected] is a quicker option to reach me. Since you’ve verified you’re human, your comments automatically post and I don’t get notified.
Thanks, sorry I freaked out a bit…the bread came out ok, but it was very dense…I know I left it too long for the starter and then the fridge proof was weird. I’m trying again today and now have two bannetons and all the proper tools. Only had one last time and am used to a different method. Also I realize I’m in Hawaii and time difference is a thing. 😬
Ok! So this is good information to know. Because you’re more humid than I am, you’ll need to either adjust the recipe with more flour or less water. Also you’re right, timing is important!! With heat and humidity, your dough will proof faster.